Snippets API Sign Up
This tutorial will use our demo API, Snippets API, to show how to use ScanAPI. Snippets API was built based on the Django REST Framework’s tutorial. You can access it at demo.scanapi.dev/.
Certainly, you can use ScanAPI to document and test any REST API. We are only using Snippets API to demonstrate it.
The main goal of this API is to manage code snippets. Each code snippet has a corresponding syntax highlight for it, based on the language, linenos and style.
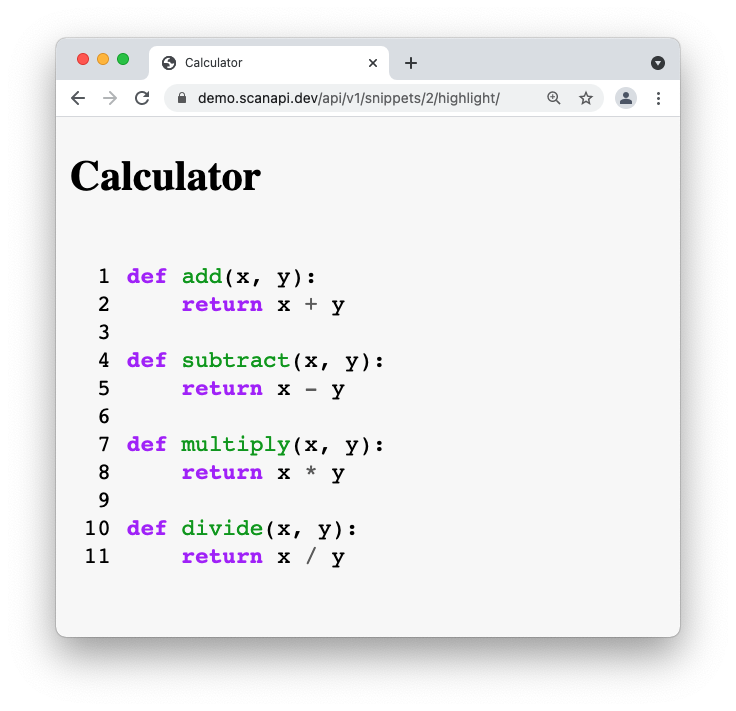
This is an example of a code snippet: demo.scanapi.dev/api/v1/snippets/2/
{
  "url": "https://demo.scanapi.dev/api/v1/snippets/2/",
  "id": 2,
  "highlight": "https://demo.scanapi.dev/api/v1/snippets/2/highlight/",
  "owner": "admin",
  "title": "Calculator",
  "code": "def add(x, y):\r\n    return x + y\r\n\r\ndef subtract(x, y):\r\n    return x - y\r\n\r\ndef multiply(x, y):\r\n    return x * y\r\n\r\ndef divide(x, y):\r\n    return x / y",
  "linenos": true,
  "language": "python",
  "style": "emacs"
}
and this is its highlighted version: demo.scanapi.dev/api/v1/snippets/2/highlight/
Documentation
You can access the Snippets API swagger documentation at: demo.scanapi.dev/api/v1/swagger-ui/.
Sign Up
Snippets API have two types of endpoints:
- - Endpoints that does not require authentication.
Ex:
GET /heath,GET /snippets - - Endpoints that requires authentication.
Ex:
POST /snippets,DELETE /snippets/<snippet_id>. Authentication is required because it is important to store which user made that action. Like who created/deleted/updated a snippet code, for example.
In order to be able to test the endpoints that require authentication, let’s register a new user in the Snippets API.
For that, visit the Snippets API registration page and
- - Fill the username field with a username that you like
- - Fill the email field with your email
- - Fill the password1 field with your password.
- - Fill the password2 field with the same password - it is a password confirmation.
The two password fields will display plain text (the info will not be hidden with *),
but don’t worry, it will be stored in the database properly.
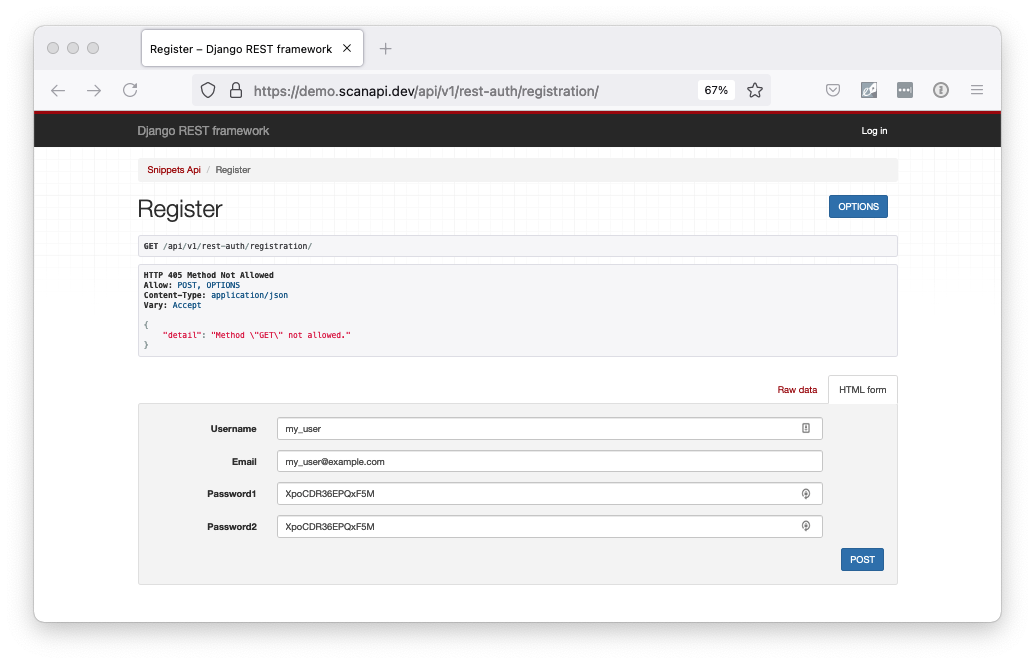
Hit the button POST. You should see a screen similar to this:
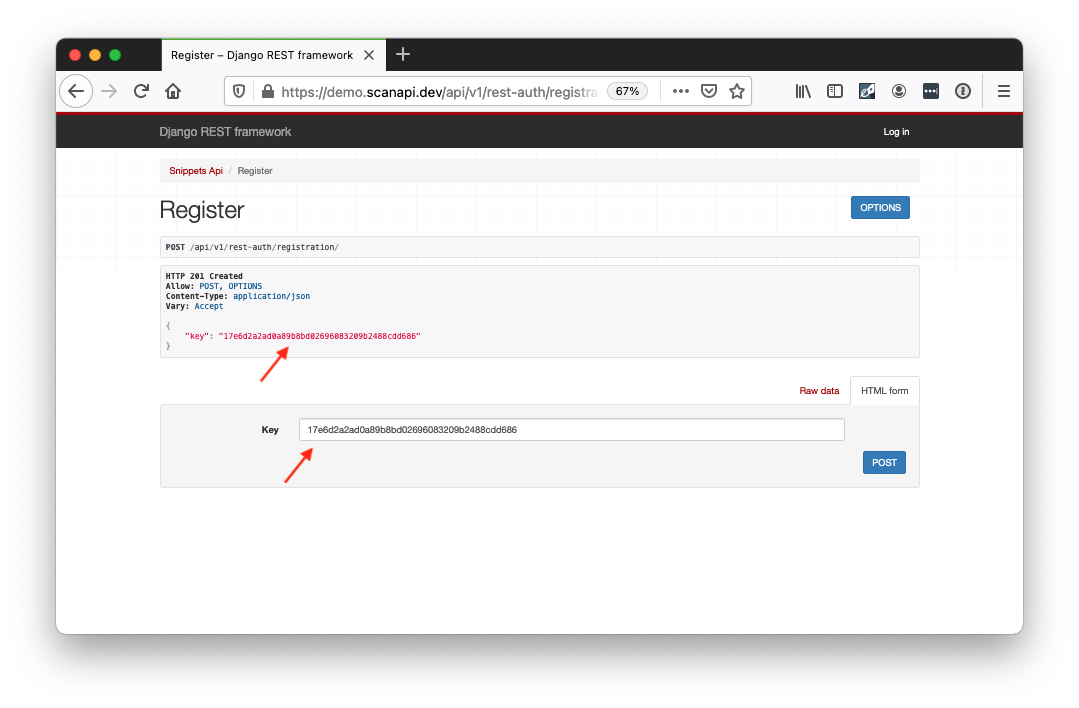
The response will return a key to you, this is your Authentication Token.
It is used to make requests that need authentication by sending its value in the HTTP request
header:
Authorization: Token <your_token>
You don’t need to worry on saving this value. We will get it dynamically with ScanAPI later. You only need to remember your username and your password. 🔑
Great, now that you already have an user registered, you can close the registration page. Take a look around and get familiar with the Snippets API. After feeling comfortable with it, you are ready to get started using ScanAPI!